> ## Documentation Index
> Fetch the complete documentation index at: https://docs.choicely.com/llms.txt
> Use this file to discover all available pages before exploring further.
# Quick Start
> Quickly integrate the Choicely Android SDK into your project
Quickly integrate the Choicely Android SDK into a fresh project by following these steps. This guide covers repository setup, dependencies, and essential configuration for both Java and Kotlin projects.
## Create An Android Project
Open Android Studio and click New Project to create a new project. Choose your desired project template, for example Empty Activity, and click Next. Now enter your app name and package name.
## Set Java & Kotlin and AGP Version
Make sure to set the Java versions is 17 and Kotlin versions 2.2.10 in your project settings. Also, ensure that you are using the latest version of Android Gradle Plugin (AGP) for optimal compatibility with the Choicely SDK.
## Open Build.gradle (App)
In your project, navigate to the `build.gradle` file located in the app module. This is where you'll add the necessary configurations for the Choicely SDK.
## Set Compile Option
```kotlin theme={null}
compileOptions {
sourceCompatibility JavaVersion.VERSION_17
targetCompatibility JavaVersion.VERSION_17
}
kotlinOptions {
jvmTarget = "17"
}
```
## 1. Add Repository Server
To access the Choicely SDK, you need to add the Maven Central repository to your project. This allows Gradle to fetch the SDK dependencies correctly.
```groovy Java theme={null}
pluginManagement {
repositories {
......
mavenCentral()
}
}
dependencyResolutionManagement {
repositoriesMode.set(RepositoriesMode.FAIL_ON_PROJECT_REPOS)
repositories {
......
mavenCentral()
}
}
```
```kotlin Kotlin theme={null}
pluginManagement {
repositories {
......
maven(url = "https://jitpack.io")
mavenCentral()
}
}
dependencyResolutionManagement {
repositoriesMode.set(RepositoriesMode.FAIL_ON_PROJECT_REPOS)
repositories {
......
maven(url = "https://jitpack.io")
mavenCentral()
}
}
```
## 2. Add the Choicely SDK
To add the Choicely SDK for Android as a dependency, add the following to your app-level build.gradle file inside the dependencies block.
```groovy Java theme={null}
implementation platform("com.choicely.sdk:bom:1.1.1")
implementation "com.choicely.sdk:android-core"
```
```groovy Kotlin theme={null}
implementation(platform("com.choicely.sdk:bom:1.1.1"))
implementation("com.choicely.sdk:android-core")
```
## 3. Create Application Class
Create an `Application` class in your project, extend `Application`, and initialize the Choicely SDK inside `onCreate()`. Then, set your application class in the `AndroidManifest.xml` file.
```java Java theme={null}
public class YourApplication extends Application {
@Override
public void onCreate() {
super.onCreate();
ChoicelySDK.init(this,APP_KEY);
}
}
```
```kotlin Kotlin theme={null}
class YourApplication : Application() {
override fun onCreate() {
super.onCreate()
ChoicelySDK.init(this,APP_KEY)
}
}
```
For testing purposes, you can use the following app key: `Y2hvaWNlbHktZXUvYXBwcy9kS1lHUUtUbWREa1pRb1ltZFRiZQ`
Alternatively, you can create a new app using Choicely Builder: [How to create apps with Choicely](https://www.choicely.com/tutorials/how-to-create-apps-with-choicely-using-an-app-template)
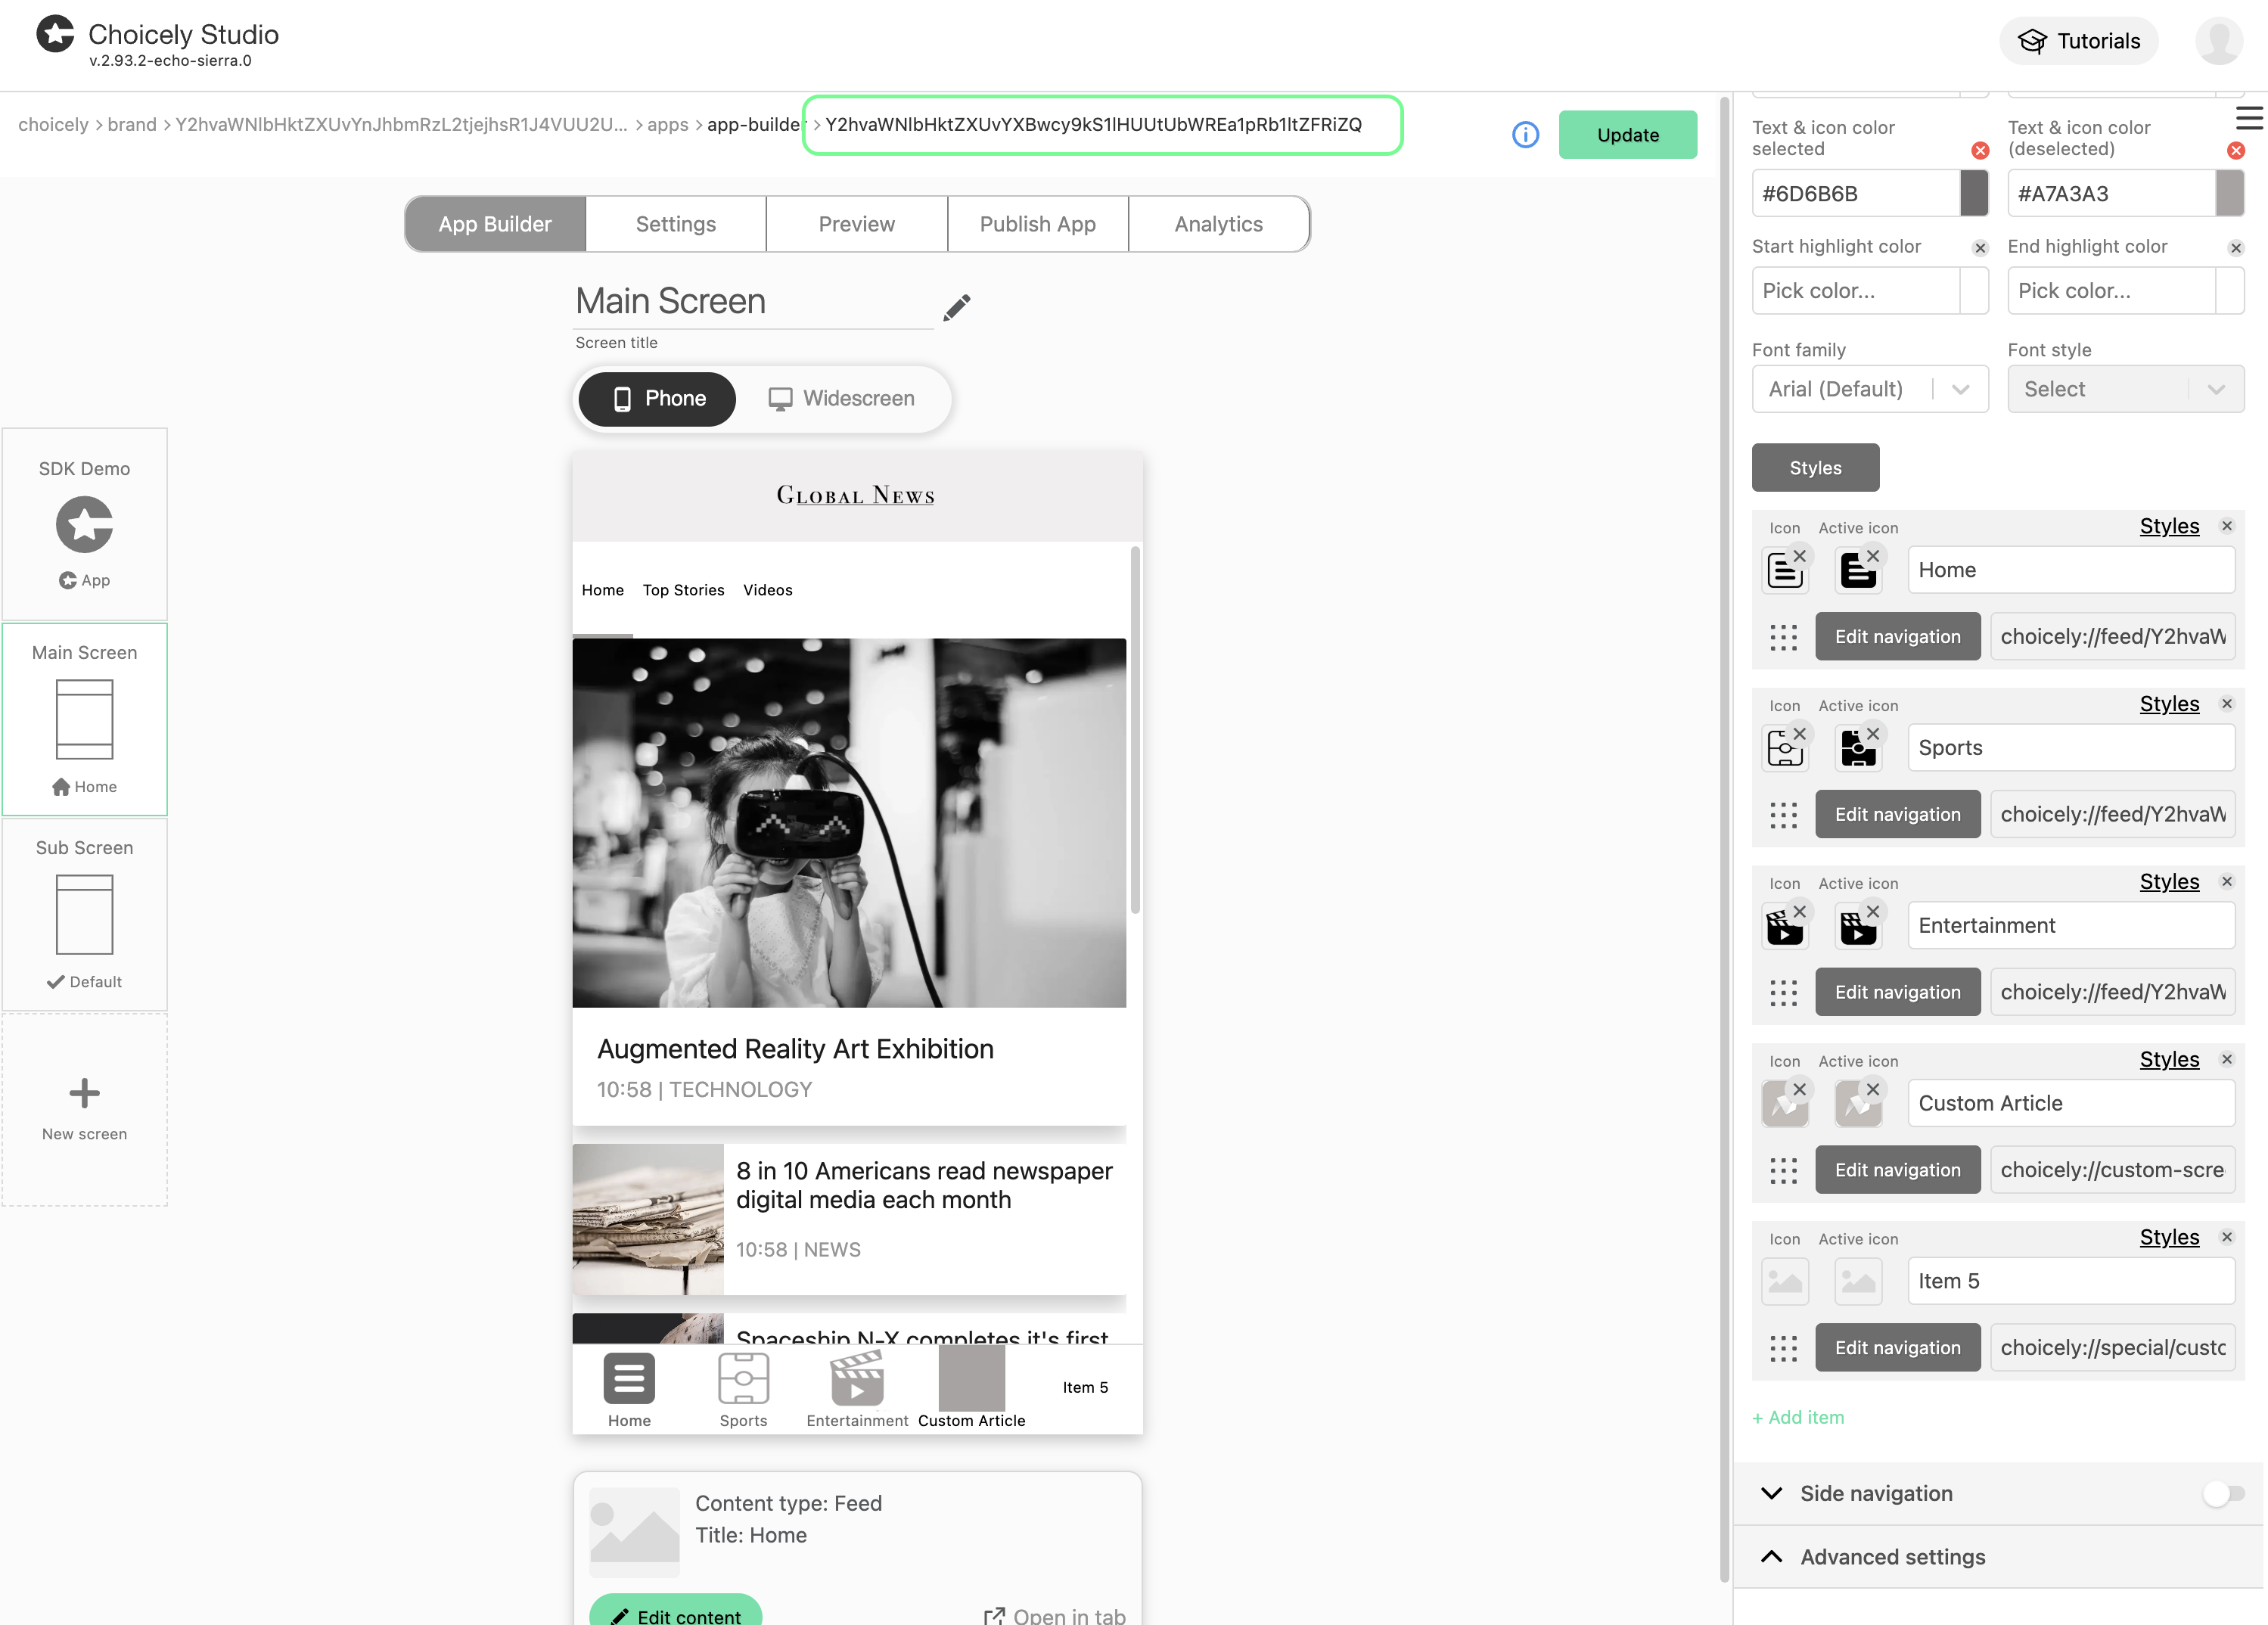 Here's how to get the app key from the Choicely builder.
### Add application Class in Manifest
```xml theme={null}
...
```
We use our own splash activity to launch the application, so please avoid using a custom splash activity in your app.
🚀 Boom! You're all set — hit run and watch the magic happen.
Here's how to get the app key from the Choicely builder.
### Add application Class in Manifest
```xml theme={null}
...
```
We use our own splash activity to launch the application, so please avoid using a custom splash activity in your app.
🚀 Boom! You're all set — hit run and watch the magic happen.