> ## Documentation Index
> Fetch the complete documentation index at: https://docs.choicely.com/llms.txt
> Use this file to discover all available pages before exploring further.
# Quick Start
> Quickly integrate the Choicely iOS SDK into your project
## Add Choicely SDK to your project
Use Swift Package Manager to install and manage Choicely dependencies.
1. In Xcode, with your app project open, navigate to **File > Add Packages**.
2. When prompted, add the Choicely SDK repository:
```
https://github.com/choicely/choicely-sdk-ios.git
```
3. Choose available Choicely modules:
`ChoicelyCore` - Core SDK functionality + App Realtime Updates
`ChoicelyFirebase` - Social Login, Push Notifications, Analitycs
`ChoicelyMap` - Location, Interactive Map, Google Maps Integration
`ChoicelyShop` - In-App Purchases, Subscriptions, Paid Votes
Detailed information about setup, features and module usage can be found in the corresponding menu sections: [ChoicelyFirebase](/ios/firebase), [ChoicelyMap](/ios/map), [ChoicelyShop](/ios/shop).
## Import and initialize ChoicelySDK
1. Import the ChoicelyCore module in your App struct or UIApplicationDelegate:
```swift theme={null}
import ChoicelyCore
```
2. Initialize SDK with `ChoicelySDK.initialize(...)` method.
```swift UIKit theme={null}
@UIApplicationMain
class AppDelegate: UIResponder, UIApplicationDelegate {
func application(_ application: UIApplication, didFinishLaunchingWithOptions launchOptions: [UIApplication.LaunchOptionsKey: Any]?) -> Bool {
ChoicelySDK.initialize(
application: application,
appKey: "YOUR_APP_KEY"
)
return true
}
...
}
```
```swift SwiftUI theme={null}
@main
struct YourApp: App {
init() {
ChoicelySDK.initialize(
application: UIApplication.shared,
appKey: "YOUR_APP_KEY"
)
}
...
}
```
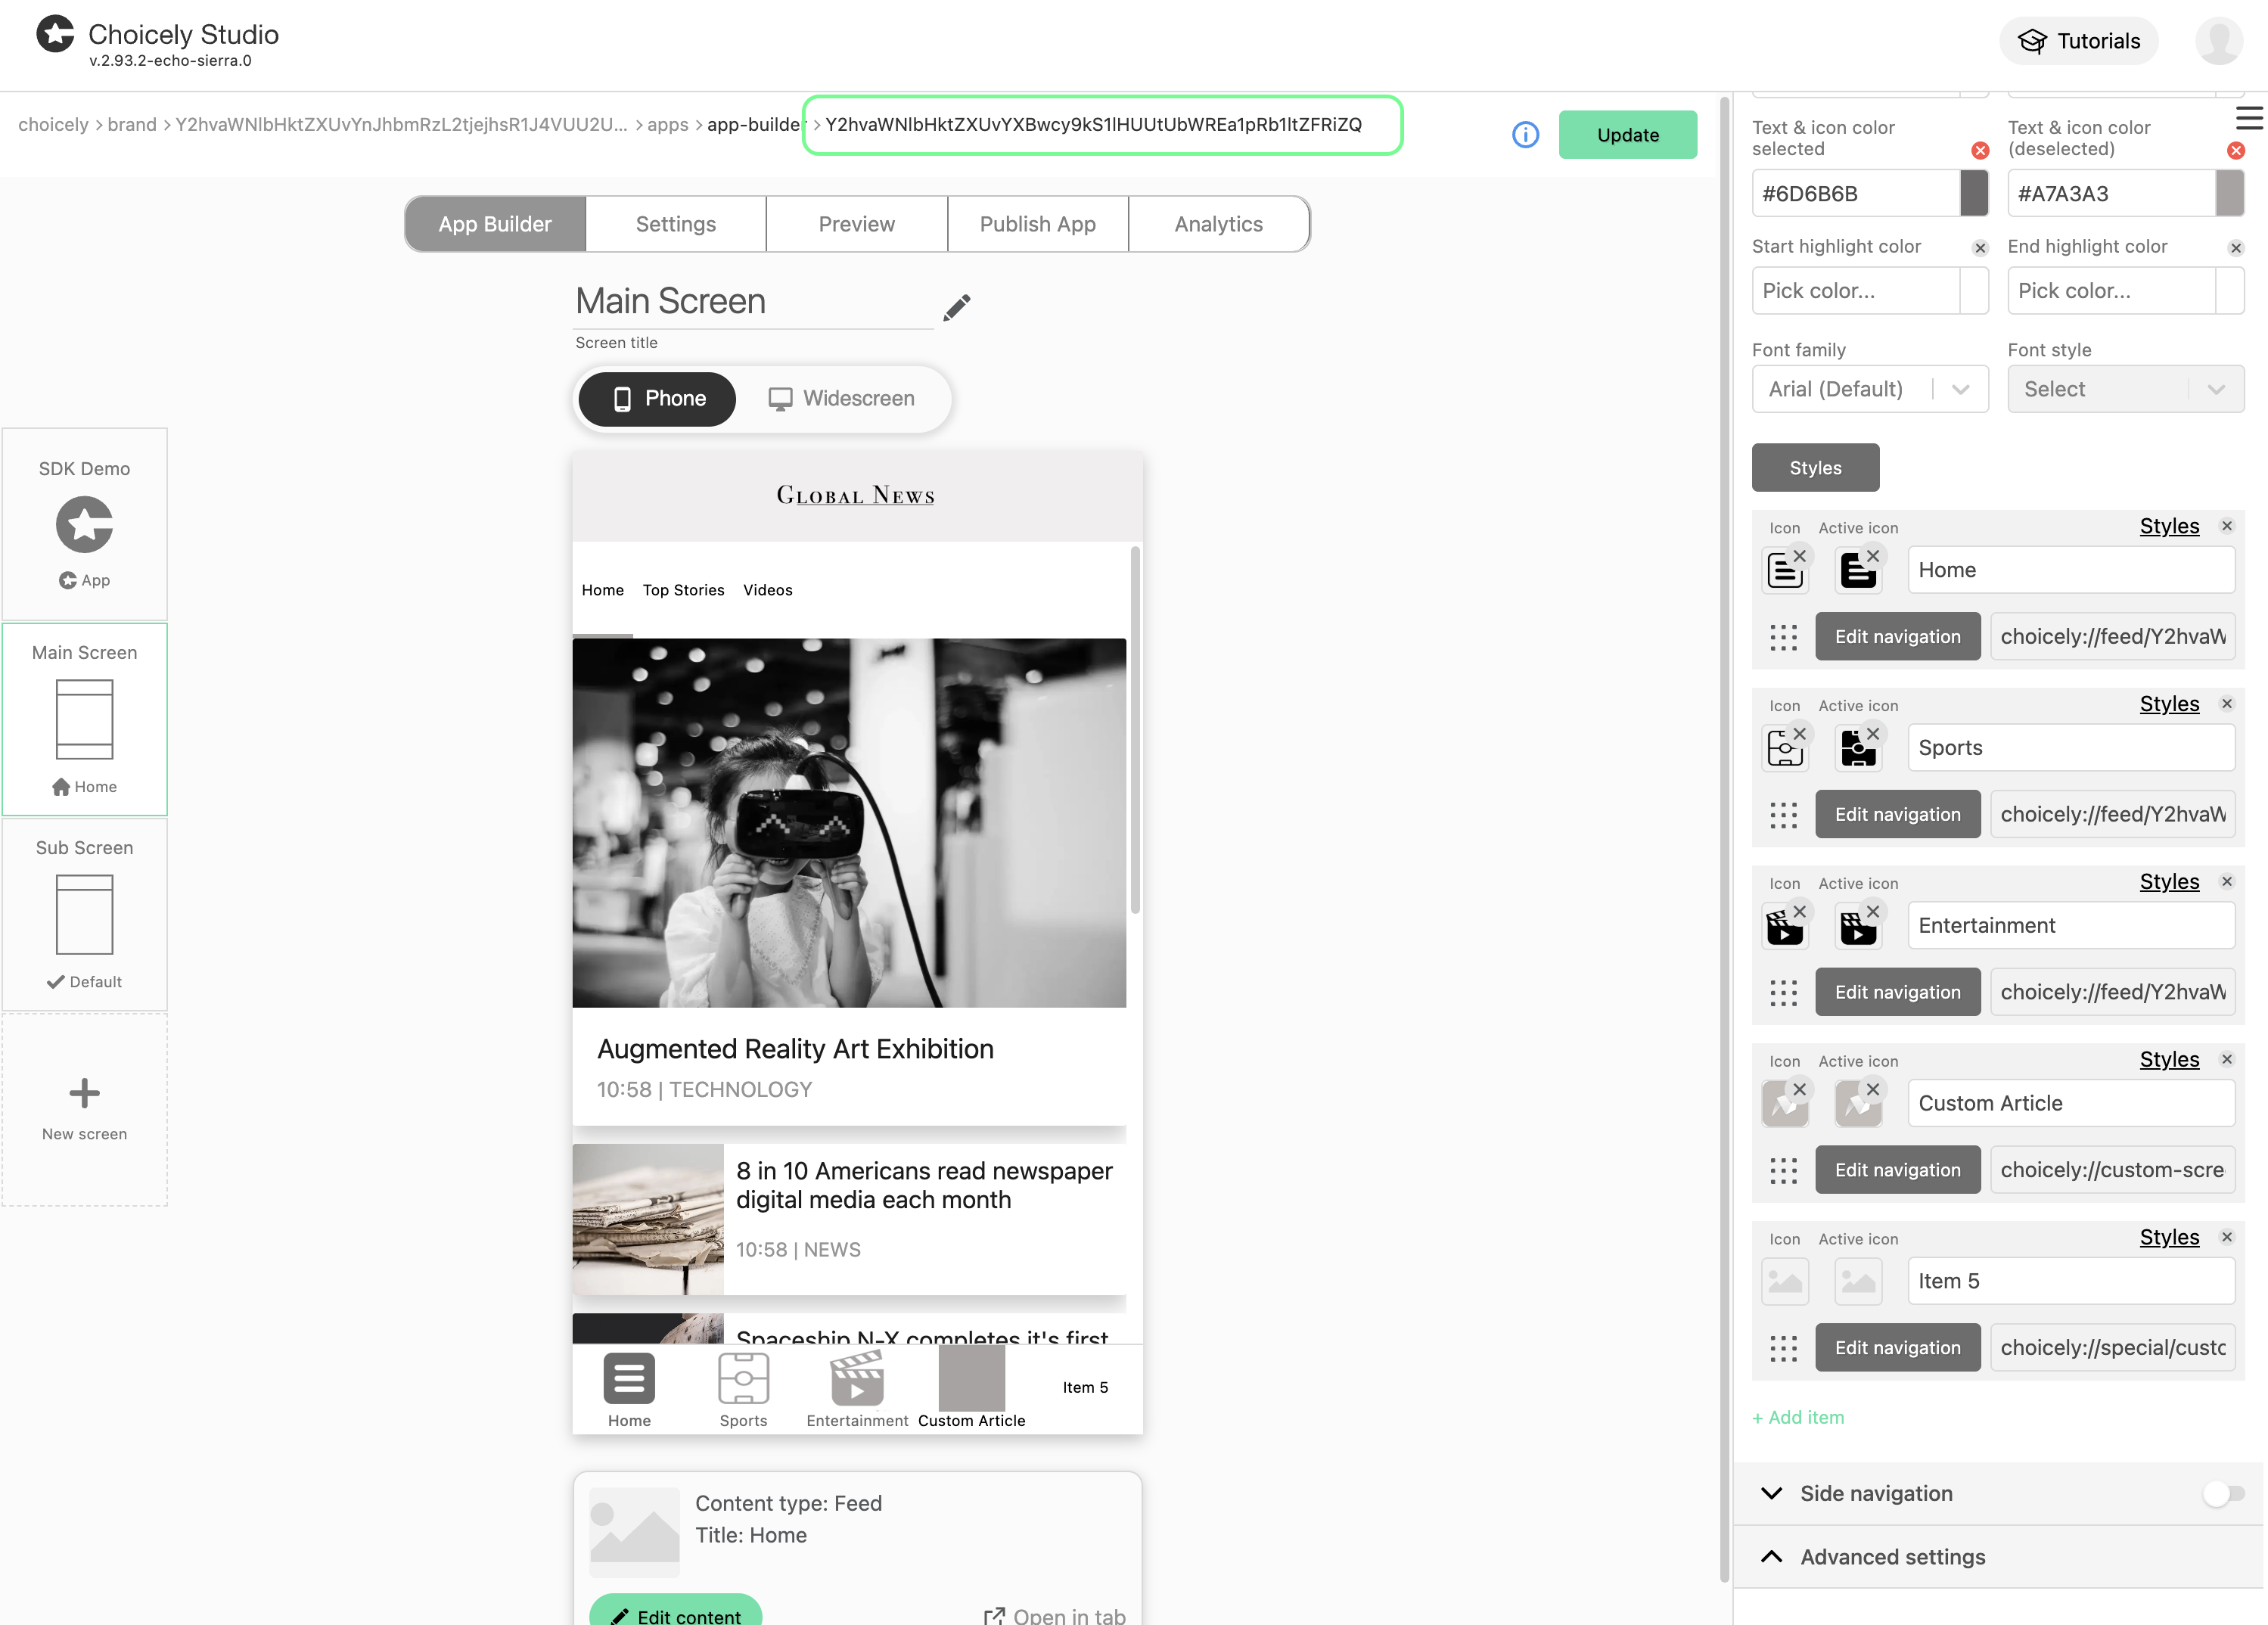
For testing purposes, you can use the SDK Demo app key: `Y2hvaWNlbHktZXUvYXBwcy9kS1lHUUtUbWREa1pRb1ltZFRiZQ`
The SDK Demo app itself is available on github: [choicely-sdk-demo](https://github.com/choicely/choicely-sdk-demo)
Alternatively, you can create your own app using Choicely Builder: [How to create apps with Choicely](https://www.choicely.com/tutorials/how-to-create-apps-with-choicely-using-an-app-template)
Here's where you can find the app key in Choicely Studio:
 ## Set the initial view and present it
1. Use the `ChoicelySplashViewController` or `ChoicelySplashView` as the root `UIViewController/SwiftUI.View` for your app:
```swift UIKit theme={null}
window = UIWindow()
window?.rootViewController = ChoicelySplashViewController()
window?.makeKeyAndVisible()
```
```swift SwiftUI theme={null}
var body: some Scene {
WindowGroup {
ChoicelySplashView()
}
}
```
2. That's it! You're ready to launch the app.
To enable Push Notifications, Social Login and Analitycs go to the next [ChoicelyFirebase](/ios/firebase) section.
## Set the initial view and present it
1. Use the `ChoicelySplashViewController` or `ChoicelySplashView` as the root `UIViewController/SwiftUI.View` for your app:
```swift UIKit theme={null}
window = UIWindow()
window?.rootViewController = ChoicelySplashViewController()
window?.makeKeyAndVisible()
```
```swift SwiftUI theme={null}
var body: some Scene {
WindowGroup {
ChoicelySplashView()
}
}
```
2. That's it! You're ready to launch the app.
To enable Push Notifications, Social Login and Analitycs go to the next [ChoicelyFirebase](/ios/firebase) section.