> ## Documentation Index
> Fetch the complete documentation index at: https://docs.choicely.com/llms.txt
> Use this file to discover all available pages before exploring further.
# Shop
> Enable in-app purchases, subscriptions, and paid votes in your iOS app
## Features
* **In-App Purchases** – Allow users to buy items, upgrades, or digital content inside your app.
* **Subscriptions** – Offer recurring subscription plans to give users ongoing access to premium features or content.
* **Paid Votes** – Monetize voting by enabling users to purchase voting credits, which can be used in competitions or polls.
Shop features are available only to users with Premium account.
## Add ChoicelyShop to your project
If you haven't added the Choicely SDK to your project yet, please follow the steps in the [Quick start](/ios/quick-start) section.
1. Select your target and go to "General" tab. Click the "+" button on "Frameworks, Libraries, and Embedded Content" section and add ChoicelyShop module.
2. That's it! Everything is ready for ChoicelyShop features setup.
## Setup In-App Purchases
### App Store Connect
1. In your app's App Store Connect page select "In-App Purchases" under "Monetization" side menu section. Click "+" button to create new In-App Purchase.
2. Select "Consumable" for type and add a reference name (can be anything). Choose product ID that will be added to Choicely Studio later.
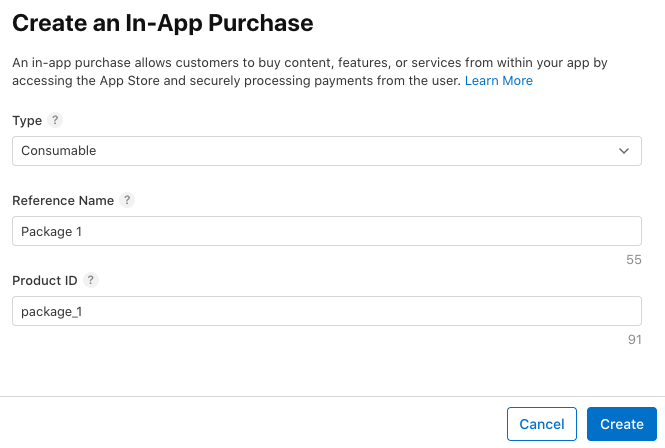 3. Click create and fill in the required fields (price, availability etc.)
### Choicely Studio
1. In Choicely Studio select your app, go to "Settings" tab on top and select "In-App Purchases".
2. Create as many packages as you need.
3. Map the product ID previously created in App Store Connect to the Store ID.
3. Click create and fill in the required fields (price, availability etc.)
### Choicely Studio
1. In Choicely Studio select your app, go to "Settings" tab on top and select "In-App Purchases".
2. Create as many packages as you need.
3. Map the product ID previously created in App Store Connect to the Store ID.
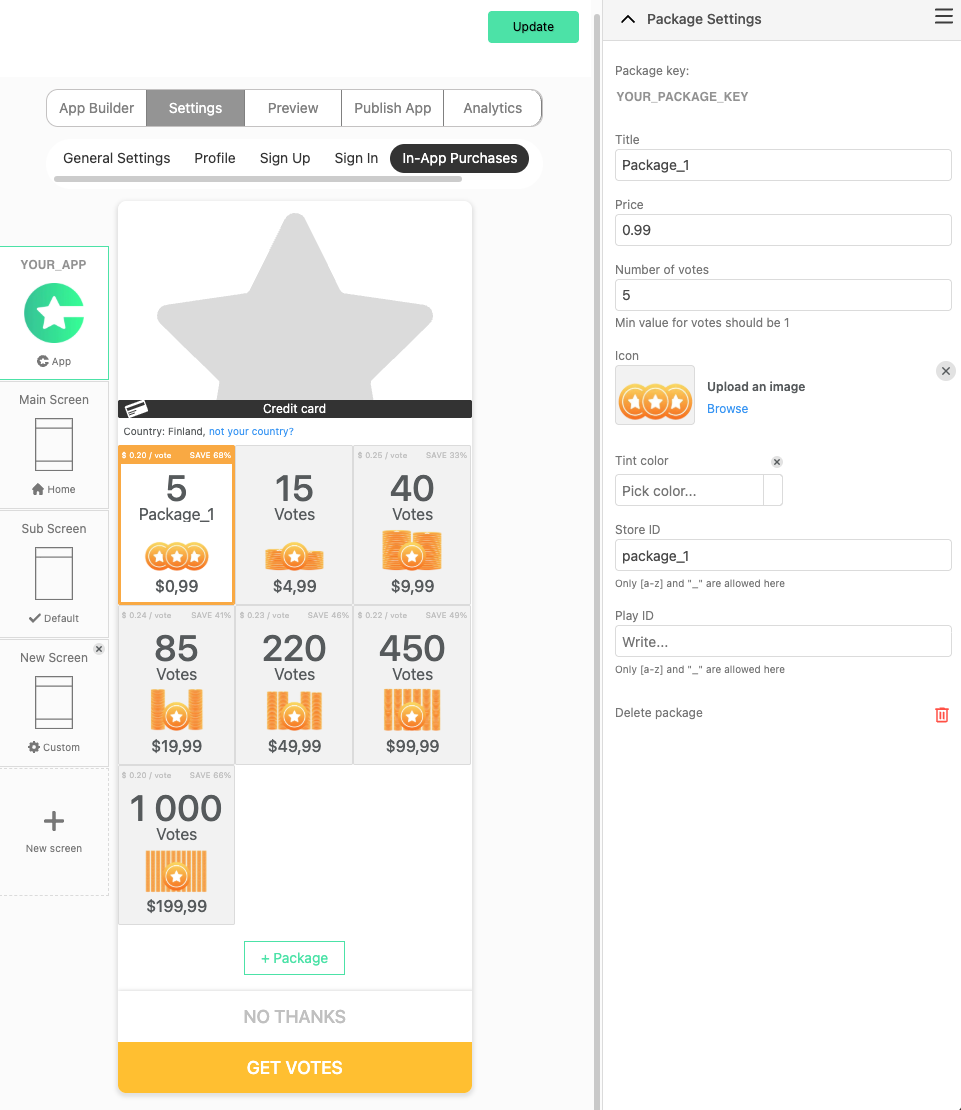 4. Click "Update" button in the top right corner.
5. That's it! You're now ready to start using in-app purchases feature in your apps.
## Setup Subscriptions
### App Store Connect
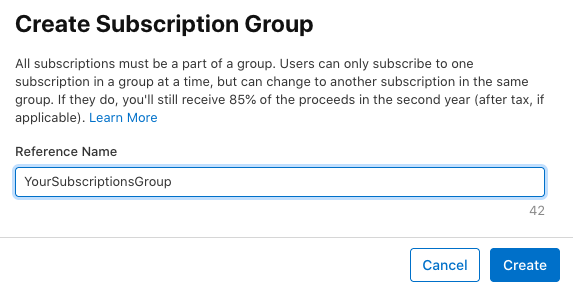
1. In your app's App Store Connect page under "Monetization" side menu section select "Subscriptions". Click "+" button to create new Subscription Group. Enter the reference name and click "Create".
4. Click "Update" button in the top right corner.
5. That's it! You're now ready to start using in-app purchases feature in your apps.
## Setup Subscriptions
### App Store Connect
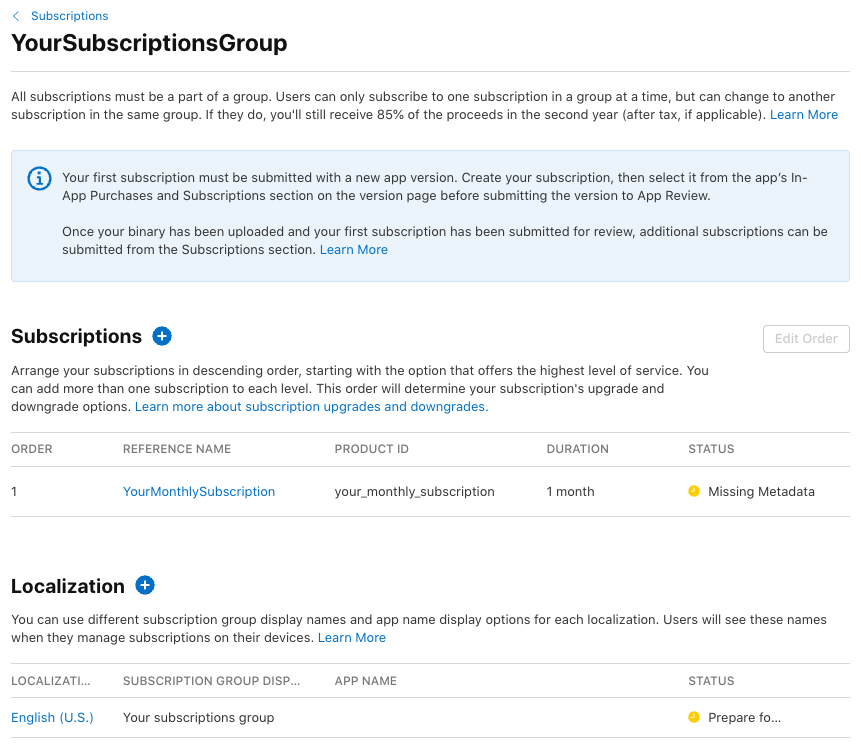
1. In your app's App Store Connect page under "Monetization" side menu section select "Subscriptions". Click "+" button to create new Subscription Group. Enter the reference name and click "Create".
 2. Click "+" button to create a new Subscription. Enter the reference name and product id for subscription and click "Create".
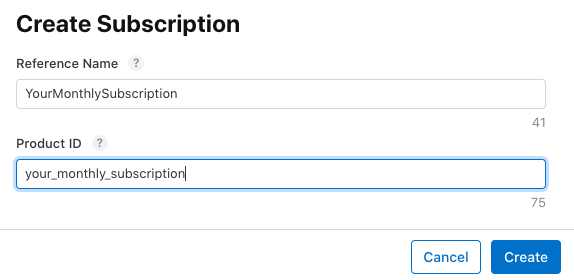 3. You will be redirected to subscription details page where you should set its duration, availability, prices and localization. Go back to subscription group details and set its localization. When everything is set up it will look like this:
 ### Choicely Studio
1. In your apps Choicely Studio select "Shop" section in the side menu. Select "Subscription" tab and click "Create Shop" button. Confirm that you want to create a new subscription shop.
### Choicely Studio
1. In your apps Choicely Studio select "Shop" section in the side menu. Select "Subscription" tab and click "Create Shop" button. Confirm that you want to create a new subscription shop.
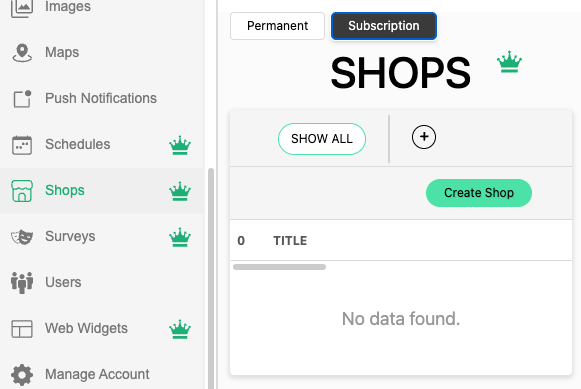 2. You will see a blank package and a button with "+ Package" title. Click on it and enter packages title and price.
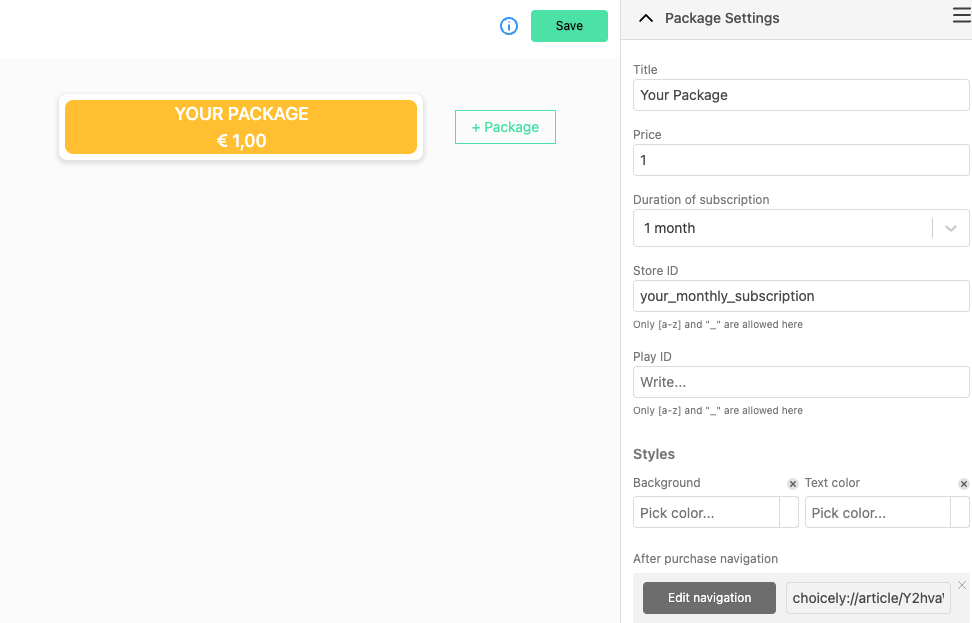
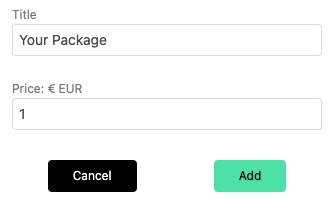 3. Click "Add" button and you will see your newly created subscription package with all its options. Set its duration, StoreID (subscrioption product id from App Store Connect) and navigation.
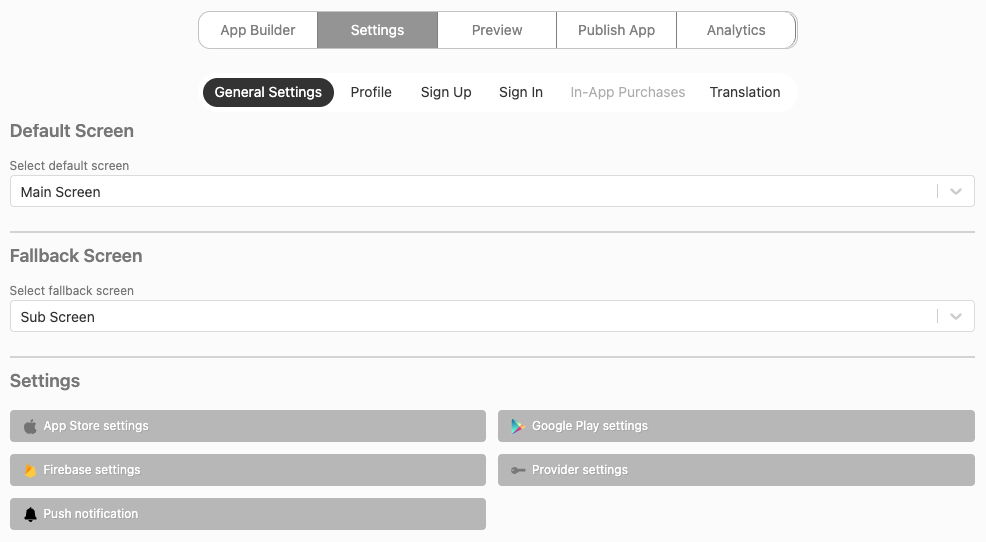
 4. You're almost done! The last thing to do is to set the AppStore settings for your app. Go to "Settings" -> "General Settings" -> "App Store Settings".
 5. In the popup fill Bundle ID, Team ID, App Store ID and Access Key fields.
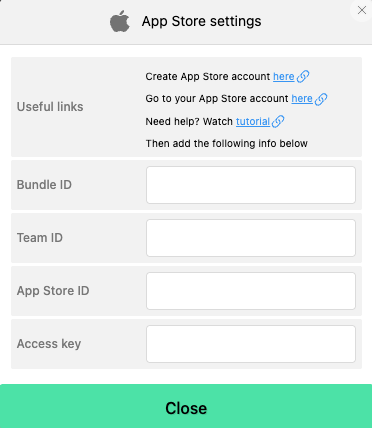 Some key names can differ from App Store Connect. Take a look at the table of terms correspondence:
| | | | | |
| --------------------- | --------- | ------- | ------------ | -------------------------- |
| **Choicely Studio** | Bundle ID | Team ID | App Store ID | Access Key |
| **App Store Connect** | Bundle ID | Team ID | Apple ID | App-Specific Shared Secret |
You can find Bundle ID and App Store ID in your app's App Store Connect -> "General" -> "App Information" -> "General Information" section.
Access Key under App Store Connect -> "General" -> "App Information" -> "App-Specific Shared Secret" section.
Team ID in [Apple developer](https://developer.apple.com/account) portal under "Membership details" section.
6. Close the popup and click "Update" button in the top right corner.
7. That's it! You're now ready to start using subscription features in your apps.
Some key names can differ from App Store Connect. Take a look at the table of terms correspondence:
| | | | | |
| --------------------- | --------- | ------- | ------------ | -------------------------- |
| **Choicely Studio** | Bundle ID | Team ID | App Store ID | Access Key |
| **App Store Connect** | Bundle ID | Team ID | Apple ID | App-Specific Shared Secret |
You can find Bundle ID and App Store ID in your app's App Store Connect -> "General" -> "App Information" -> "General Information" section.
Access Key under App Store Connect -> "General" -> "App Information" -> "App-Specific Shared Secret" section.
Team ID in [Apple developer](https://developer.apple.com/account) portal under "Membership details" section.
6. Close the popup and click "Update" button in the top right corner.
7. That's it! You're now ready to start using subscription features in your apps.