> ## Documentation Index
> Fetch the complete documentation index at: https://docs.choicely.com/llms.txt
> Use this file to discover all available pages before exploring further.
# Firebase Project Setup
> Create and configure a Firebase project for your Choicely app
## Create Choicely Brand and App
To create Choicely brand and App visit [Choicely Tutorials](https://www.choicely.com/tutorials/how-to-create-apps-with-choicely-using-an-app-template).
## Create and link Firebase project with your app and Choicely Studio
1. Go to [Firebase Console](https://console.firebase.google.com/) and create a new project.
2. Give it a name, accept the Firebase terms and click "Continue".
3. Enable and configure Google Analytics if needed and click "Create Project".
4. When your Firebase project will be ready click "Continue". You will be redirected to your project's overview page.
5. Hit the gear icon and select "Project settings" to see your Porject name and Project ID.
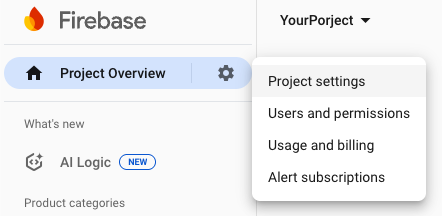 6. Copy your Porject name and Project ID. Go to your app's Choicely Studio, select "Settings" -> "General Settings" -> "Firebase settings".
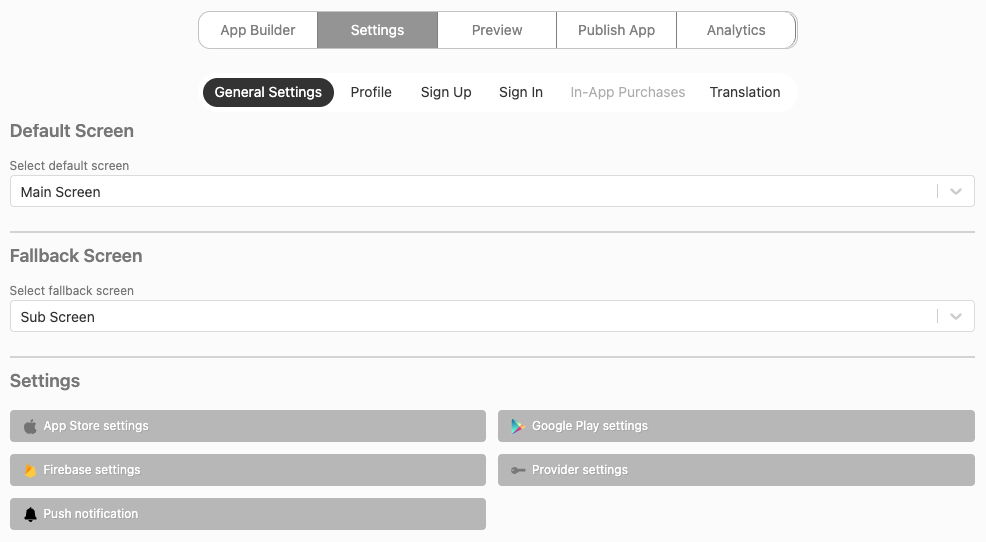 7. Click "edit" on your predefined Firebase project and set the Porject name with Project ID. Click the "Save" button.
 If you want to enable realtime updates feature you will need to set a "Database url" too. See the next section to learn where to get it.
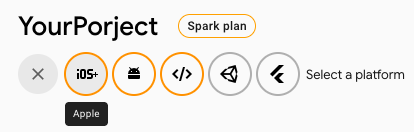
8. In order to link the Firebase Project with your apps go back to Firebase project overview page and click "Add app". Follow the instructions to add all app platforms you need.
If you want to enable realtime updates feature you will need to set a "Database url" too. See the next section to learn where to get it.
8. In order to link the Firebase Project with your apps go back to Firebase project overview page and click "Add app". Follow the instructions to add all app platforms you need.
 ## Enable Firebase realtime updates feature
1. On your Firebase project overview page go to "Build" menu section and select "Realtime Database". Click "Create Database" button, select an appropriate server location and data write rules. Click "Enable" button.
2. Copy the realtime database rules into your clipboard. You will need them in the next step.
```json theme={null}
{
"rules": {
"apps":{
"$app_key":{
".read": true,
".write": false
}
},
"screens":{
"$screen_key":{
".read": true,
".write": false
}
},
"articles":{
"$article_key":{
".read": true,
".write": false
}
},
"contests":{
"$contest_key":{
".read": true,
".write": false
}
},
"conventions":{
"$convention_key":{
".read": true,
".write": false
}
},
"feeds":{
"$feed_key":{
".read": true,
".write": false
}
},
"surveys":{
"$survey_key":{
".read": true,
".write": false
}
},
"shops":{
"$shop_key":{
".read": true,
".write": false
}
},
"maps":{
"$map_key":{
".read": true,
".write": false
}
},
"users":{
"$user_id":{
".read": "$user_id === auth.uid",
".write": "$user_id === auth.uid",
"email": {
".write": "$user_id === auth.uid"
},
"year_of_birth": {
".write": "$user_id === auth.uid"
},
"name": {
".write": "$user_id === auth.uid"
},
"gender": {
".write": "$user_id === auth.uid"
},
"consents": {
".write": "$user_id === auth.uid"
},
"updated": {
".write": "$user_id === auth.uid"
},
"$other": {
".write": false
},
"city": {
"countryCode": {
".write": "$user_id === auth.uid"
},
"id": {
".write": "$user_id === auth.uid"
},
"name": {
".write": "$user_id === auth.uid"
},
"stateName": {
".write": "$user_id === auth.uid"
},
"$other": {
".write": false
},
".write": "$user_id === auth.uid"
}
}
},
"$other": {
".read": false,
".write": false,
".validate": false
},
".write": false
}
}
```
3. In the opened Realtime Database page go to "Rules" tab, paste the rules from previous step and click "Publish".
## Enable Firebase realtime updates feature
1. On your Firebase project overview page go to "Build" menu section and select "Realtime Database". Click "Create Database" button, select an appropriate server location and data write rules. Click "Enable" button.
2. Copy the realtime database rules into your clipboard. You will need them in the next step.
```json theme={null}
{
"rules": {
"apps":{
"$app_key":{
".read": true,
".write": false
}
},
"screens":{
"$screen_key":{
".read": true,
".write": false
}
},
"articles":{
"$article_key":{
".read": true,
".write": false
}
},
"contests":{
"$contest_key":{
".read": true,
".write": false
}
},
"conventions":{
"$convention_key":{
".read": true,
".write": false
}
},
"feeds":{
"$feed_key":{
".read": true,
".write": false
}
},
"surveys":{
"$survey_key":{
".read": true,
".write": false
}
},
"shops":{
"$shop_key":{
".read": true,
".write": false
}
},
"maps":{
"$map_key":{
".read": true,
".write": false
}
},
"users":{
"$user_id":{
".read": "$user_id === auth.uid",
".write": "$user_id === auth.uid",
"email": {
".write": "$user_id === auth.uid"
},
"year_of_birth": {
".write": "$user_id === auth.uid"
},
"name": {
".write": "$user_id === auth.uid"
},
"gender": {
".write": "$user_id === auth.uid"
},
"consents": {
".write": "$user_id === auth.uid"
},
"updated": {
".write": "$user_id === auth.uid"
},
"$other": {
".write": false
},
"city": {
"countryCode": {
".write": "$user_id === auth.uid"
},
"id": {
".write": "$user_id === auth.uid"
},
"name": {
".write": "$user_id === auth.uid"
},
"stateName": {
".write": "$user_id === auth.uid"
},
"$other": {
".write": false
},
".write": "$user_id === auth.uid"
}
}
},
"$other": {
".read": false,
".write": false,
".validate": false
},
".write": false
}
}
```
3. In the opened Realtime Database page go to "Rules" tab, paste the rules from previous step and click "Publish".
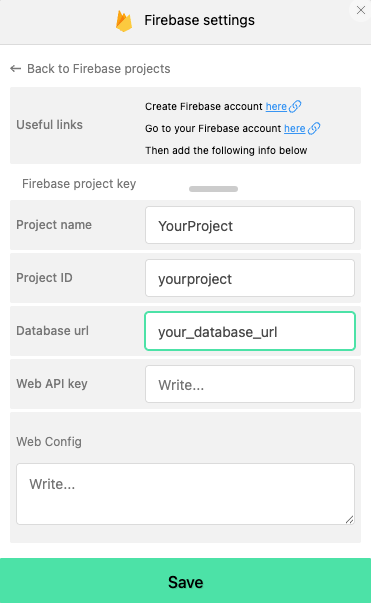
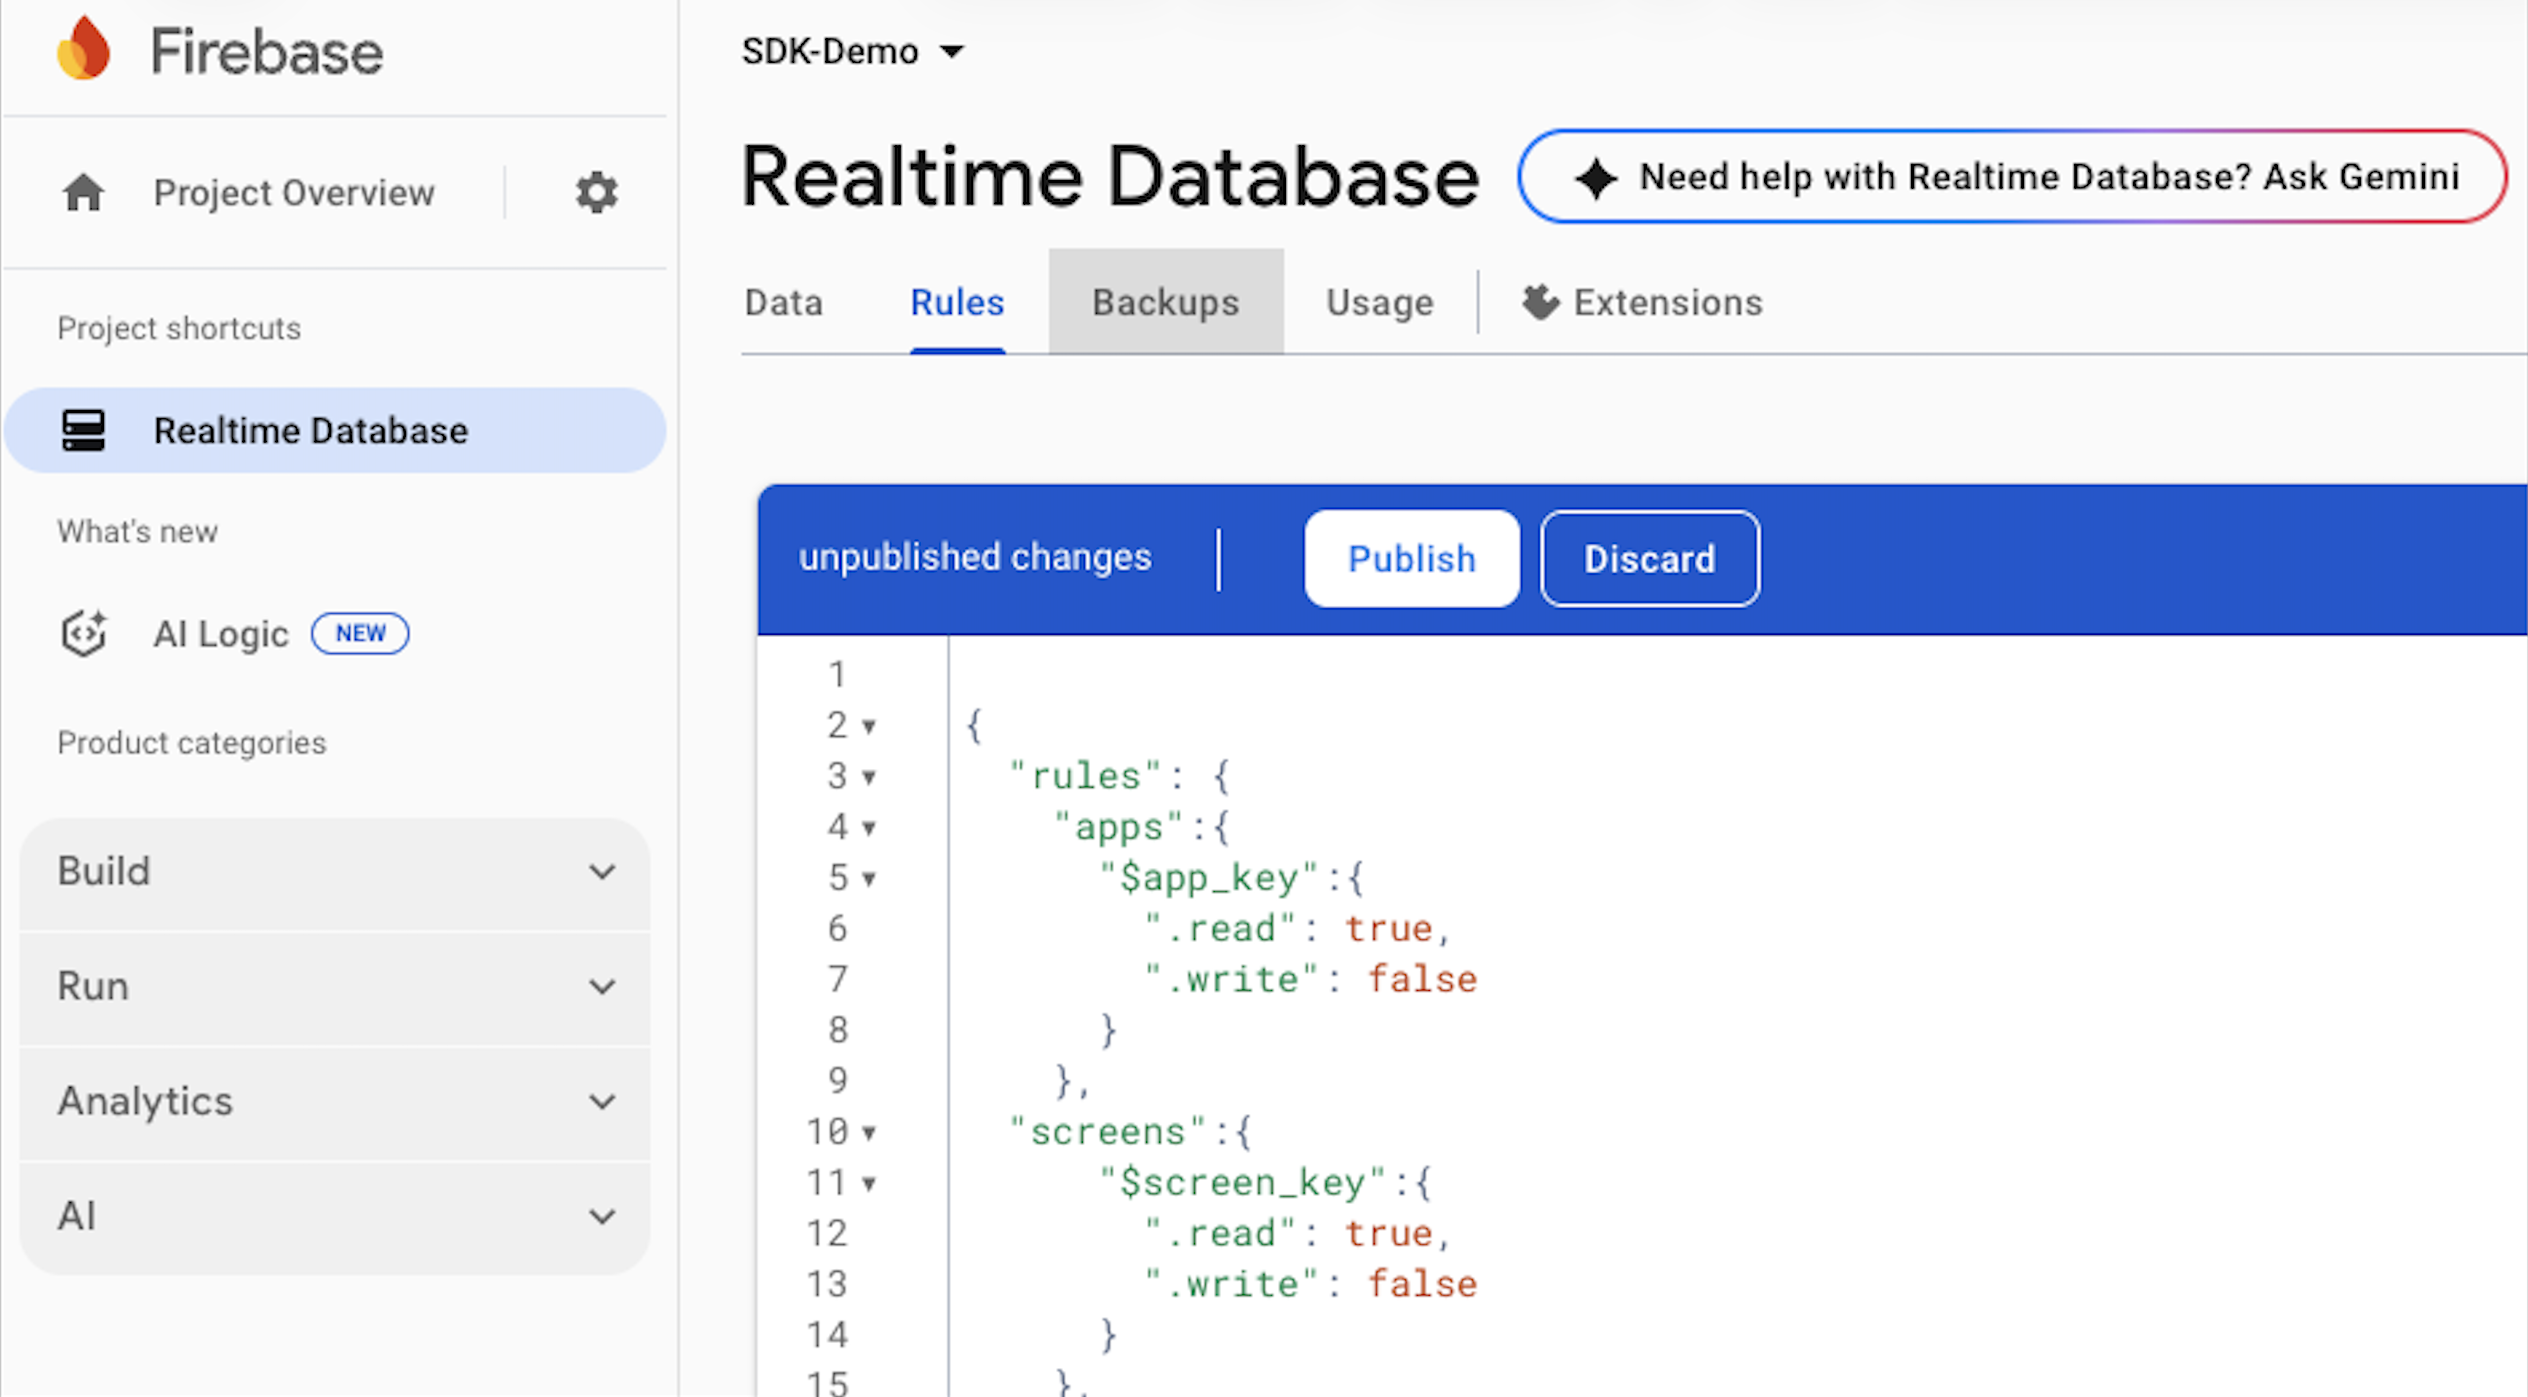 4. Go to "Data" tab on Realtime Database page, copy the database url, paste it in your app's Studio Firebase settings and click "Save":
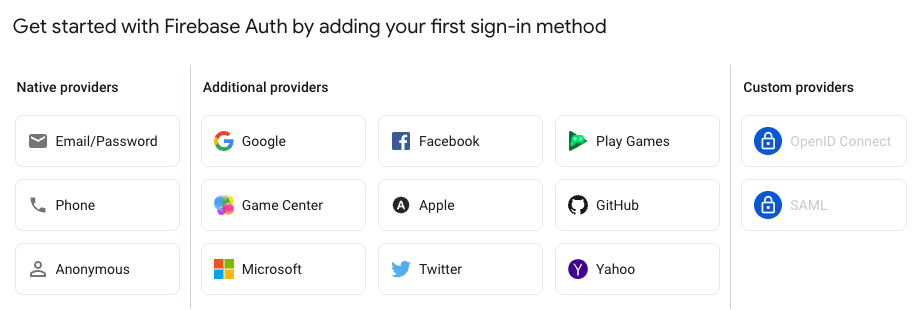
 5. The next thing to do is to get the Web API key. On your Firebase project overview page go to "Build" -> "Authentication" side menu section. Click "Get Started button" and select "Google" as a provider.
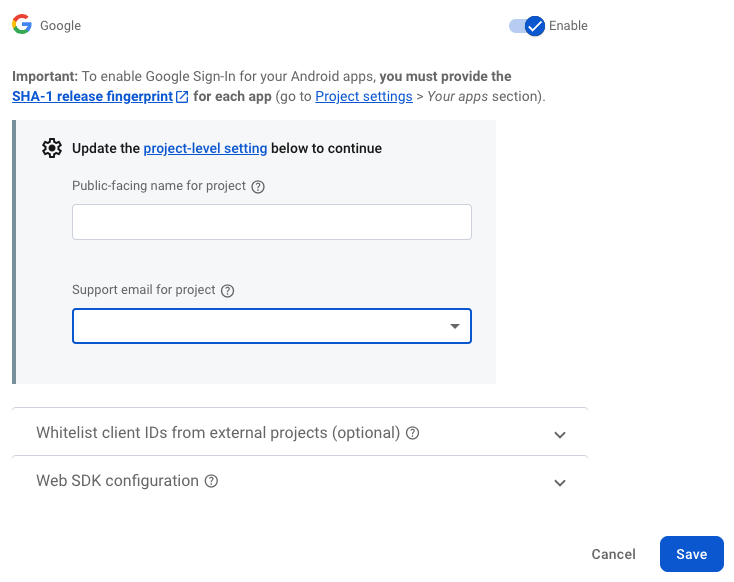
 6. Enable Google as a Sign-in provider, set your support email and click "Save".
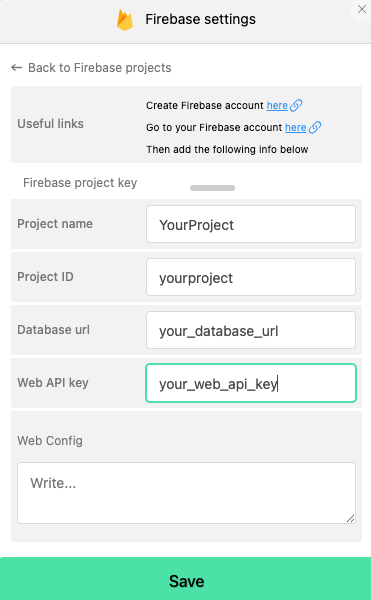
 7. Now you have your Web API Key set under "Project Overview" -> "Project settings" -> "General" tab. Copy and paste it in your app's Studio Firebase settings.
 8. Double check your apps `GoogleService-Info.plist`. The `DATABASE_URL` property should be the same as database url you pasted in Studio Firebase settings.
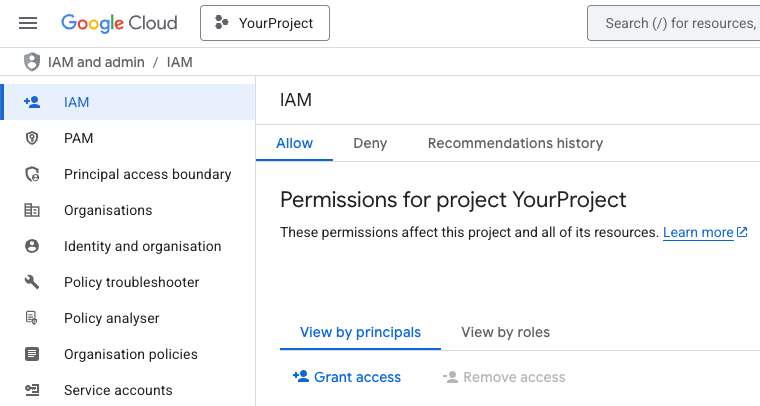
9. Go to [Google Cloud Console](https://console.cloud.google.com/) and select your project. Open the side menu and navigate to "IAM and admin" -> "IAM" section. Click "Grant access" button Under "Allow" and "View by principals" tabs.
8. Double check your apps `GoogleService-Info.plist`. The `DATABASE_URL` property should be the same as database url you pasted in Studio Firebase settings.
9. Go to [Google Cloud Console](https://console.cloud.google.com/) and select your project. Open the side menu and navigate to "IAM and admin" -> "IAM" section. Click "Grant access" button Under "Allow" and "View by principals" tabs.
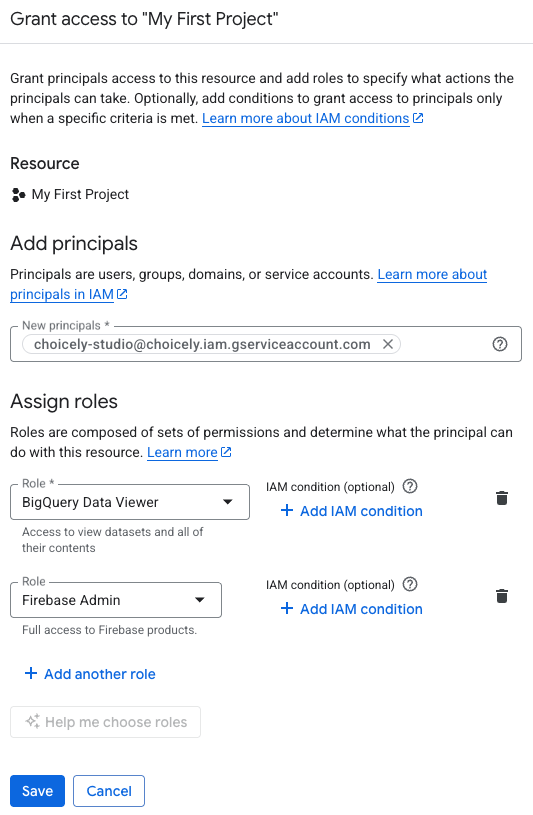
 10. Add `choicely-studio@choicely.iam.gserviceaccount.com` as principal and assign "BigQuery Data Viewer" with "Firebase Admin" roles to it. Click the "Save" button.
 11. That's it! You're now ready to start using realtime updates features in your apps.